Each municipal account includes a Restrictions Manager within its GIS map. Municipal administrators and managers can add, edit, or delete restrictions as needed. These may include temporary or permanent height and weight limits, seasonal roadway closures, or other roadway access restrictions. These restrictions are seen by applicants who use the map feature when applying for permits. By keeping applicants informed of restrictions within the municipal boundary, you help expedite the application process, safeguard local infrastructure, and improve compliance with your ordinances.
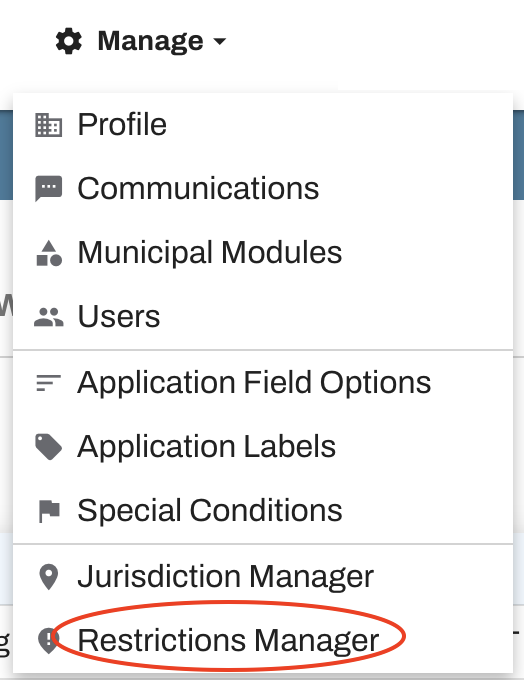
To get started, hover over Manage and select "Restrictions Manager" from the dropdown menu.
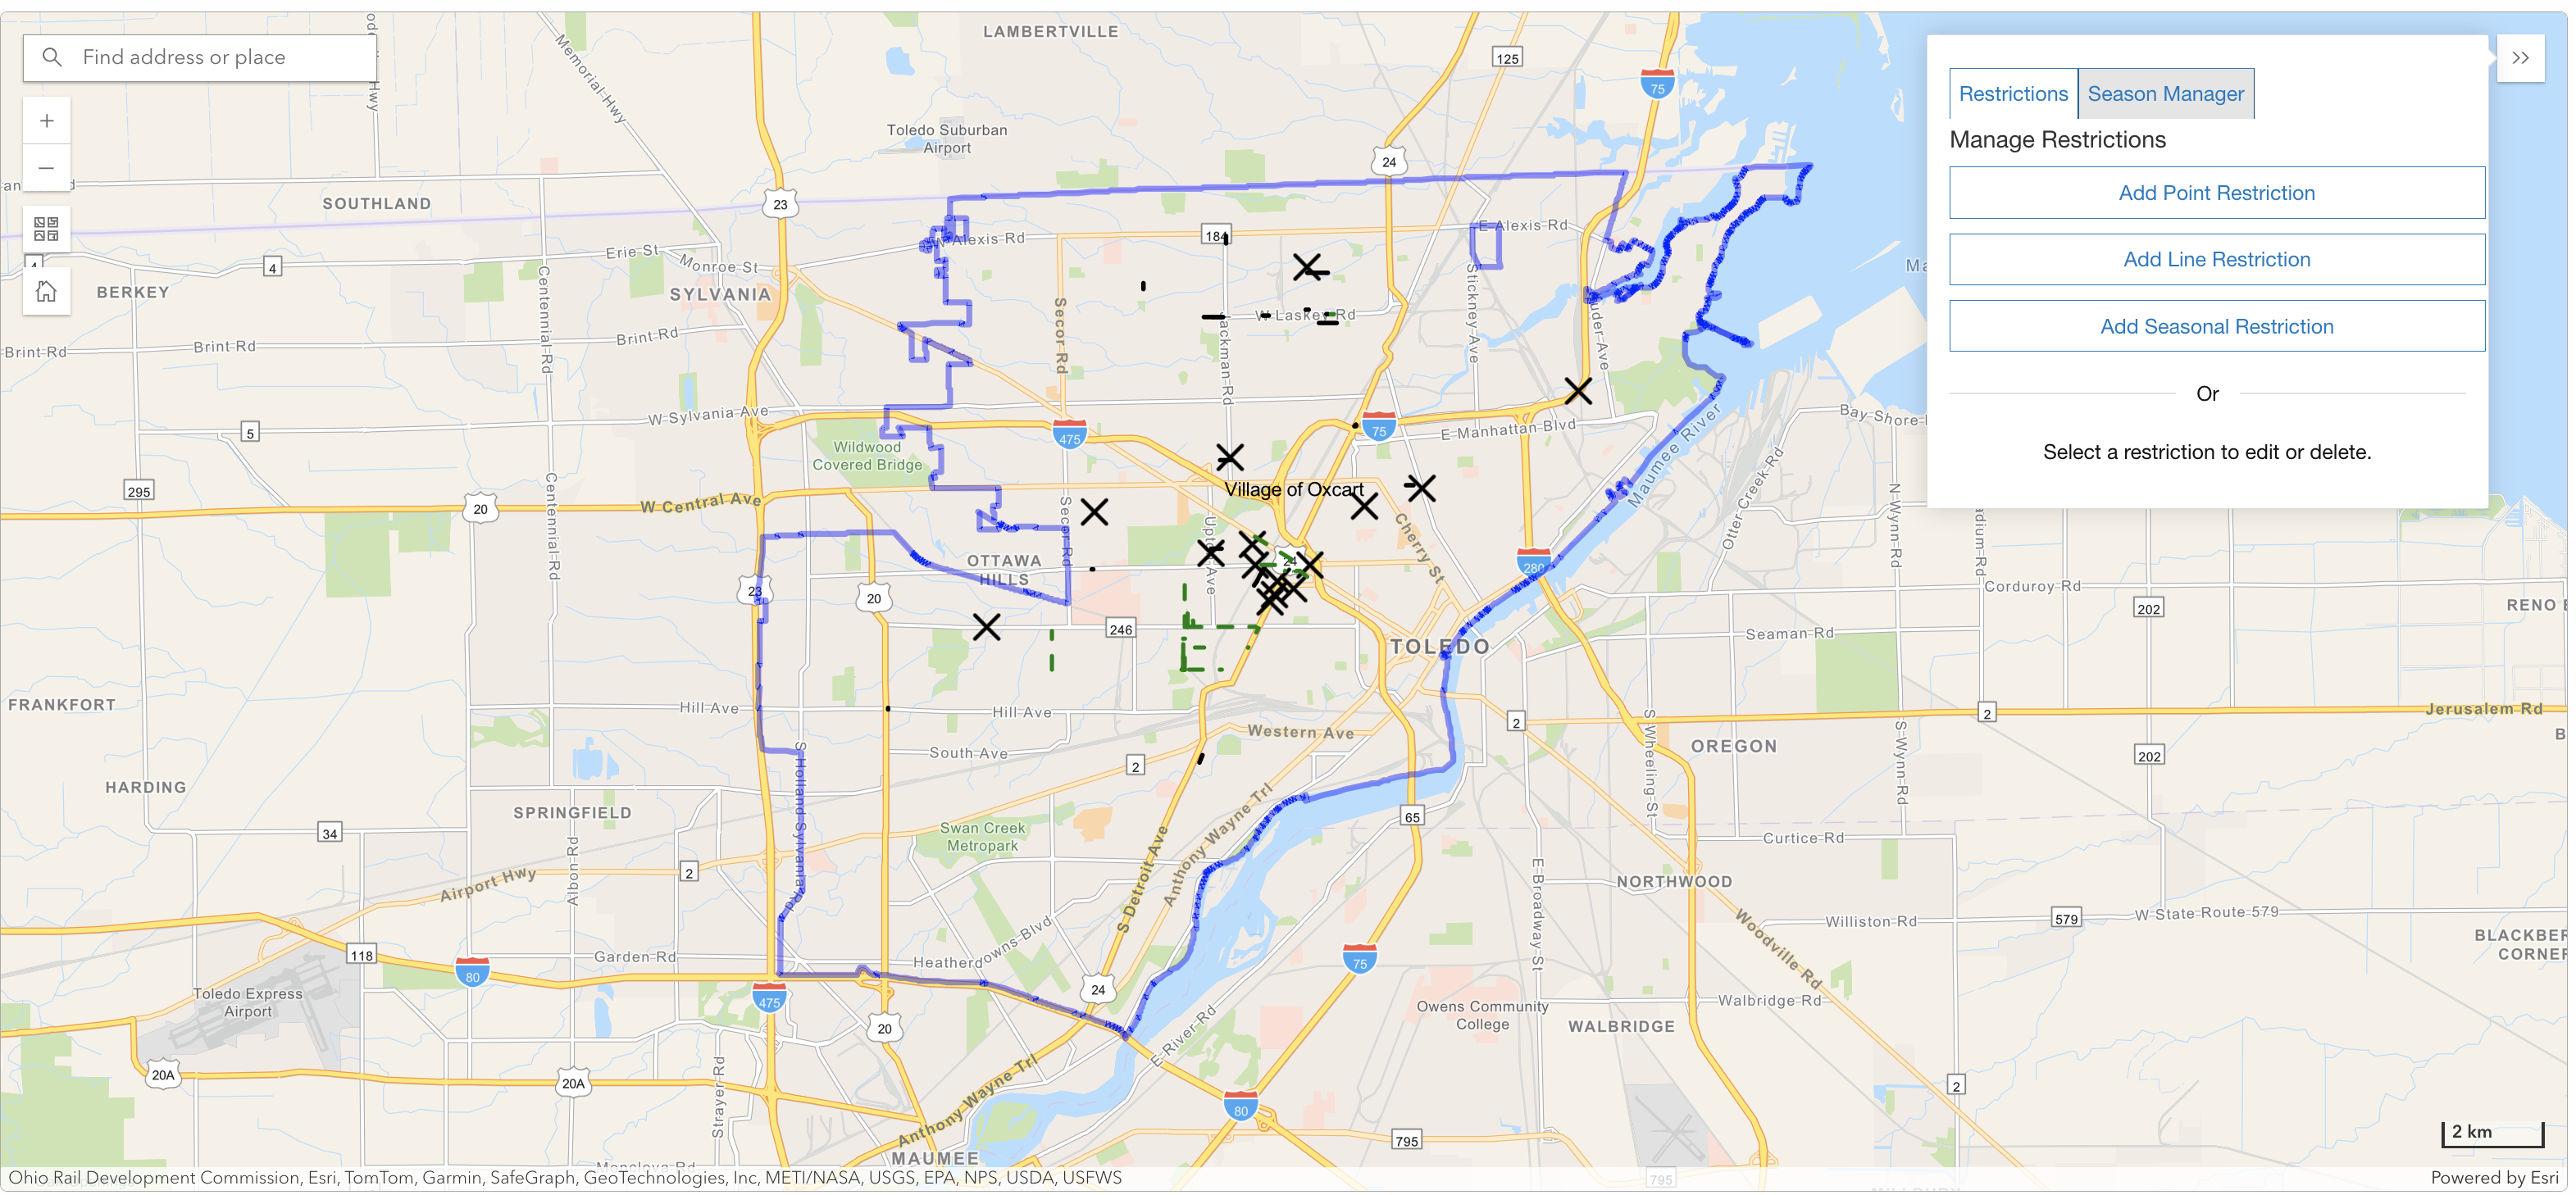
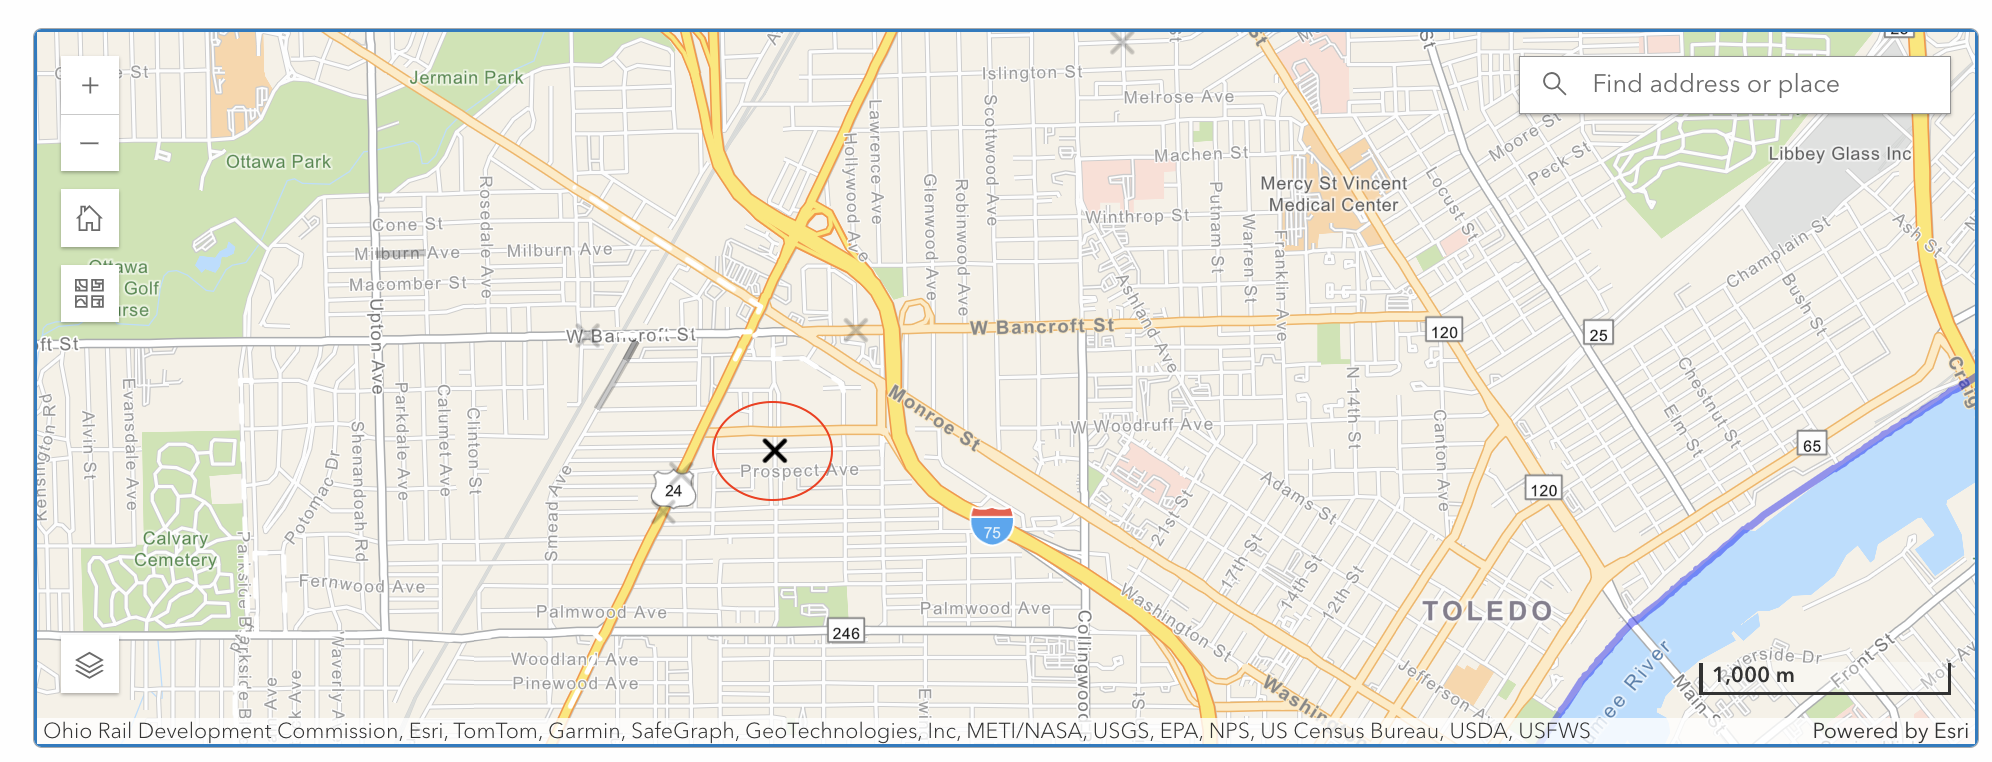
Your Restrictions Manager will open with a map of your municipality marked with your jurisdictional boundary. Use the buttons on the left side of the map to zoom in or out and adjust the map view.
ADDING RESTRICTIONS:
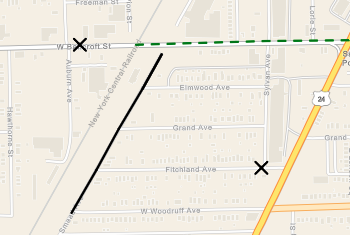
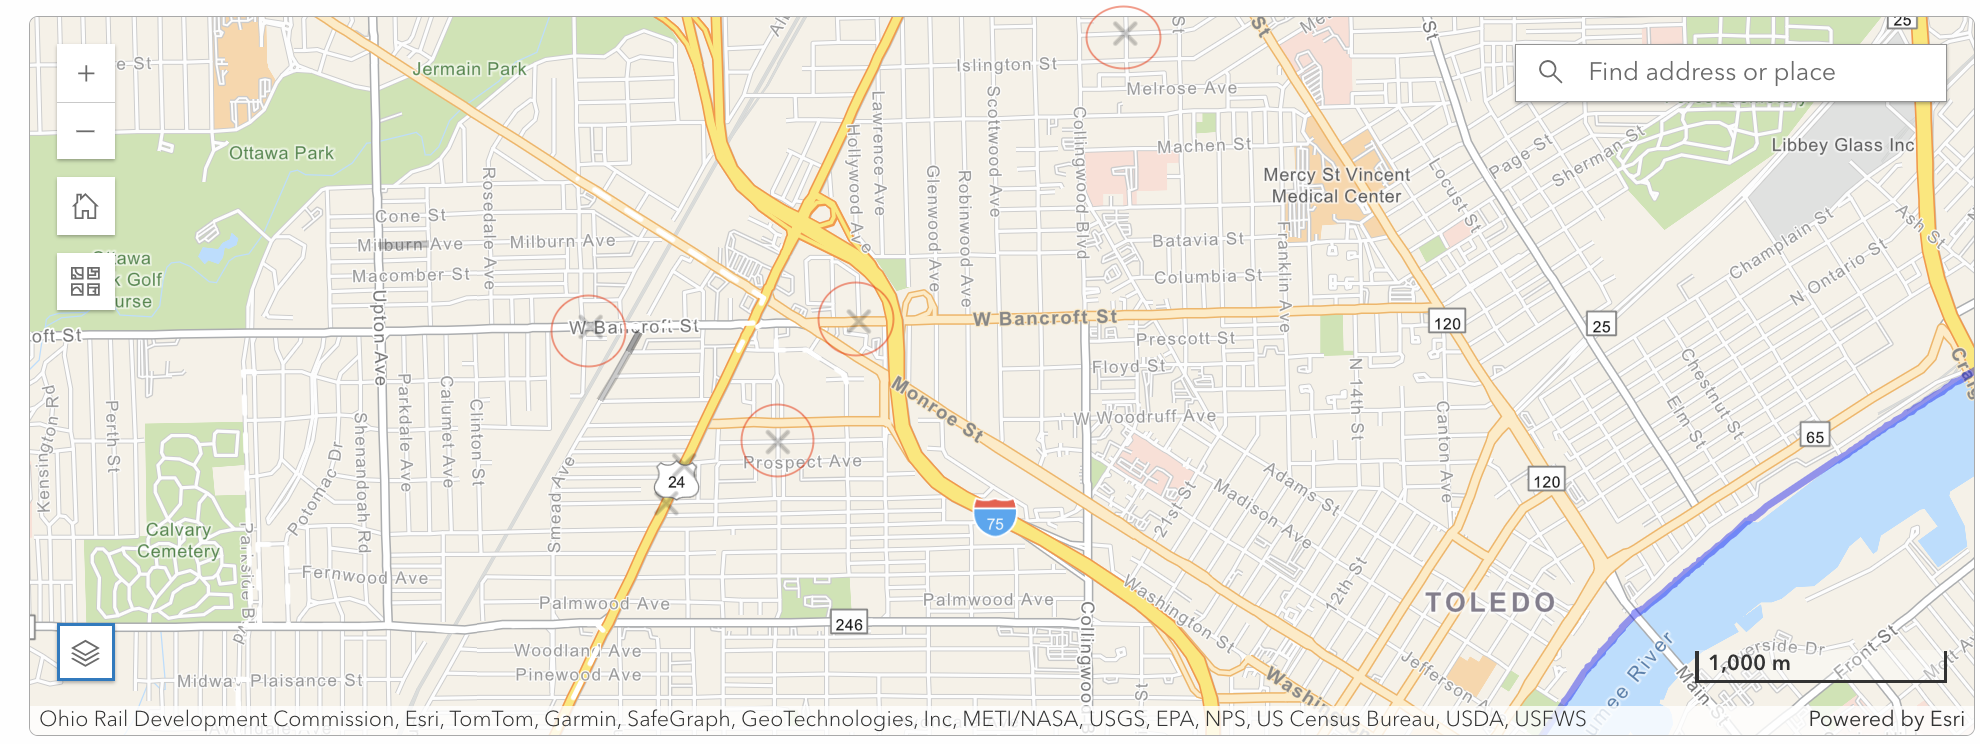
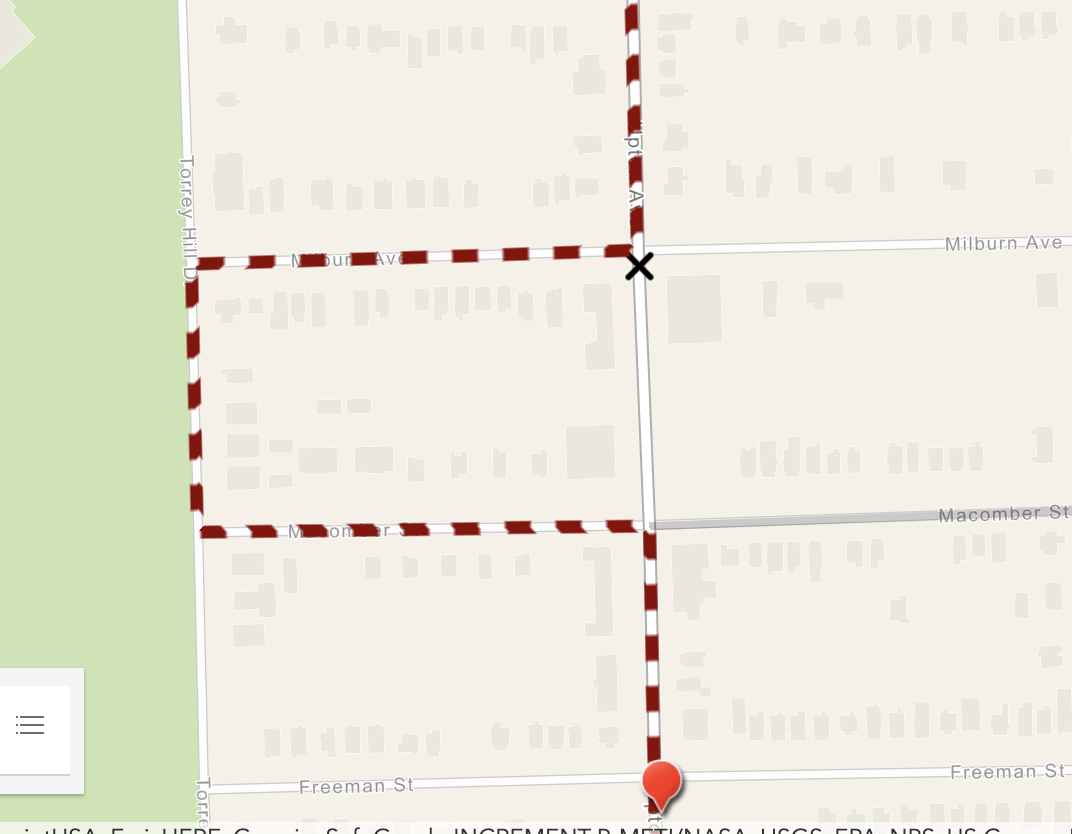
To add restrictions you'll want to zoom in to the area of the restriction. Once zoomed in, click "Add Point (or Line or Seasonal) Restriction" and then click the map where you would like the restriction to be. Point restrictions cover one specific point on the roadway and will appear on the map as a black X. Line restrictions apply to an entire road segment. Segments can vary in length, so you may need to combine multiple line restrictions to cover the full roadway. On the map, line restrictions are displayed as solid black lines, while seasonal restrictions are shown as dotted green lines.
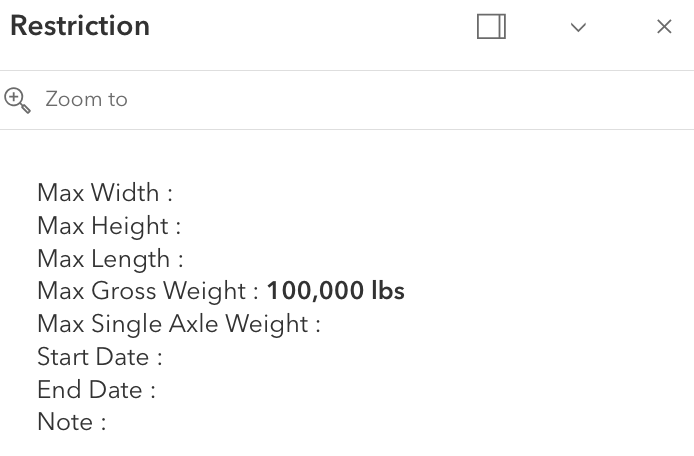
After clicking "Add Point Restriction" or "Add Line Restriction" and then clicking on the map, fields will open up for weight and dimensions. You may fill out one or more fields. It is not necessary to fill out all fields, only those that apply to that restriction.
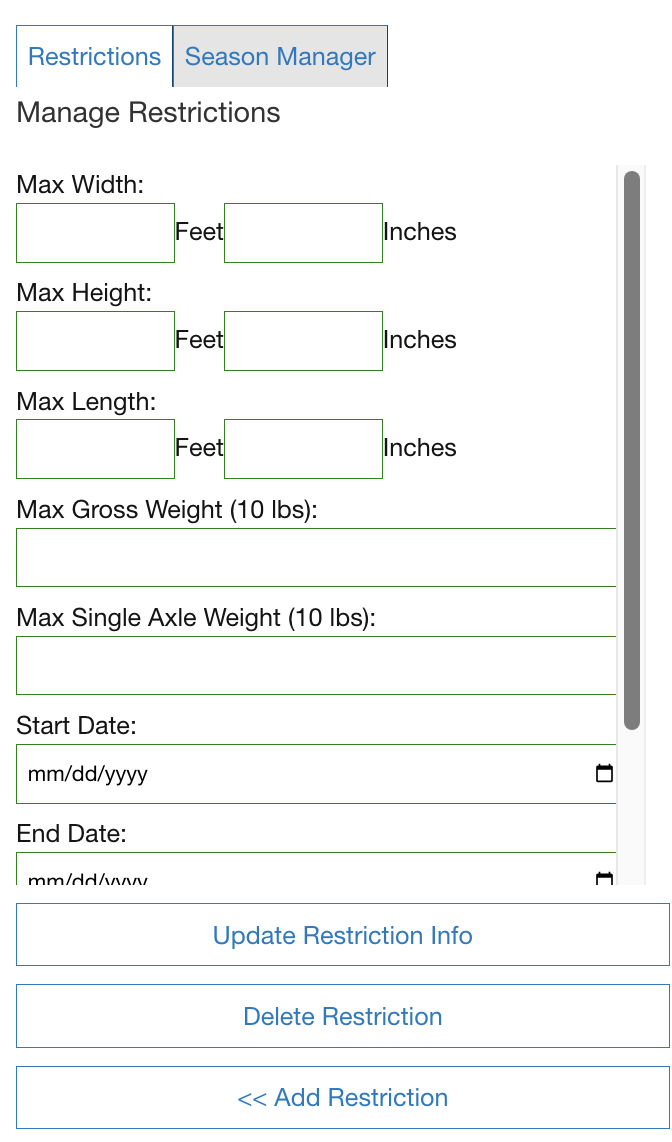
You may set a start and end date if the restriction is temporary (i.e. a road closed for a construction project). You may leave the date blank if the restriction is permanent (i.e. a bridge with a set weight limit). If you set an end date the restriction will automatically clear out of the system when it expires. If no date is set you may always edit or delete the restriction as needed.
Scrolling down will allow you to add notes to your restriction (ie Pedestrian Bridge Overhead).
Once you have filled out the necessary information for the restriction hit "Update Restriction Info" to save.
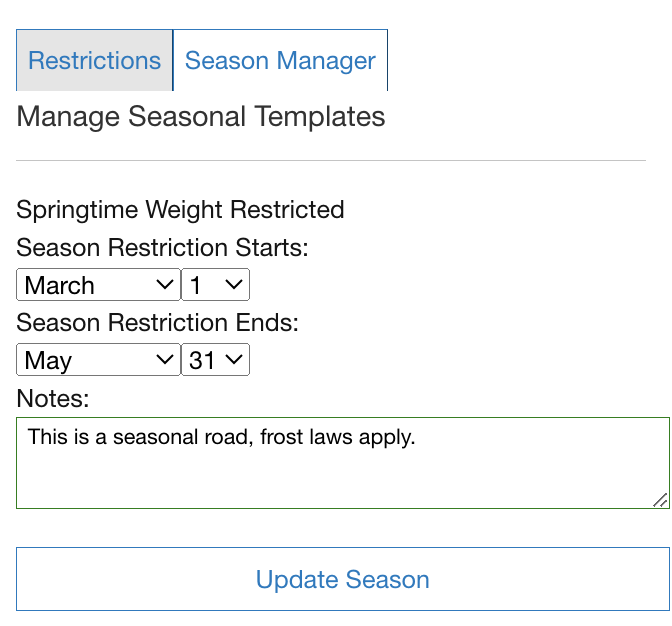
When adding a seasonal restriction, set the dates and click Update Season to save.
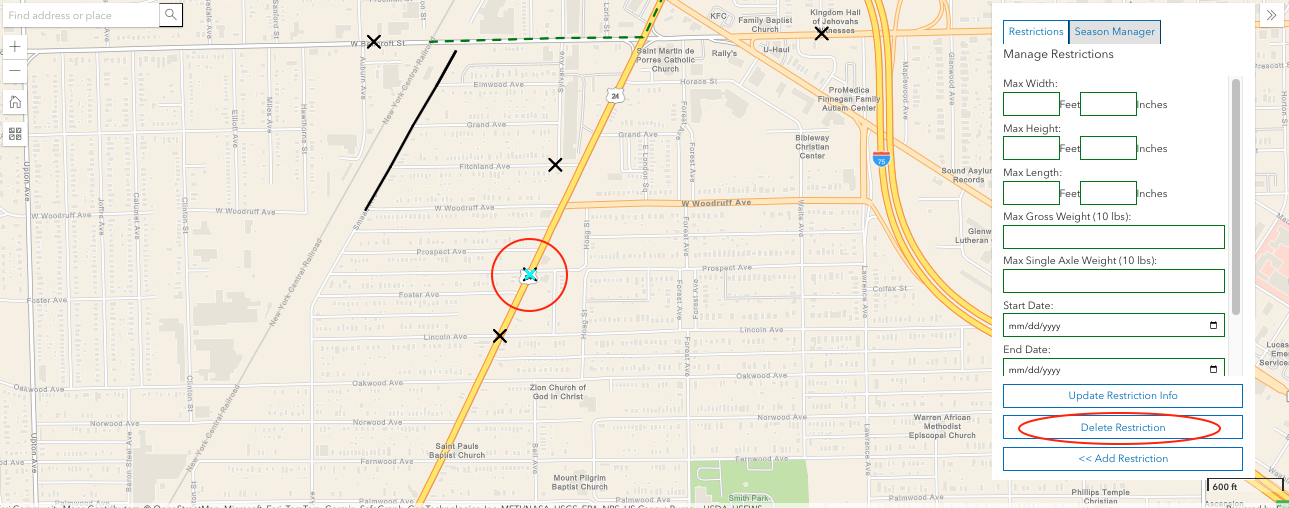
TO DELETE A RESTRICTION:
Click on the restriction. The X or line indicating the restriction will be highlighted and the restriction fields will open. Click on Delete Restriction to delete. Please note, this action is permanent.
HOW RESTRICTIONS ARE USED:
Once in place, restrictions will help generate routes and work locations more precisely. When an applicant opens your application they will see the map with restrictions grayed out.
As the applicant fills out the application, and enters weights and dimensions for the vehicle, restrictions will turn black if the vehicle exceeds them.
When a route is calculated, the applicant will be routed around any restrictions they exceed. If the vehicle does not exceed the parameters of the restrictions, it will remain gray and vehicles will be routed over that restriction.
Applicants can also click on a restriction and view its parameters.